Continuous Deployment with GitLab: how to build and deploy a RPM Package with GitLab CI
I would like to automate building custom rpm packages with gitlab using their CI/CD functionality. This article is a documentation of my personal notes on the matter.
Installation
You can find notes on how to install gitlab-community-edition here: Installation methods for GitLab. If you are like me, then you dont run a shell script on you machines unless you are absolutely sure what it does. Reading script.rpm.sh and you are on a centos 7 machine, you can follow the below notes and install gitlab-ce by hand:
Import gitlab PGP keys
# rpm --import https://packages.gitlab.com/gitlab/gitlab-ce/gpgkey

# rpm --import  https://packages.gitlab.com/gitlab/gitlab-ce/gpgkey/gitlab-gitlab-ce-3D645A26AB9FBD22.pub.gpg
Gitlab repo
# curl -s 'https://packages.gitlab.com/install/repositories/gitlab/gitlab-ce/config_file.repo?os=centos&dist=7&source=script' \
  -o /etc/yum.repos.d/gitlab-ce.repo
Install Gitlab
# yum -y install gitlab-ceConfiguration File
The gitlab core configuration file is /etc/gitlab/gitlab.rb
Plz try to remember that every time you make a change, you need to reconfigure gitlab:
# gitlab-ctl reconfigureMy VM’s IP is: 192.168.122.131 so you can change the external_url to that or you can add a new entry on your hosts file.
external_url 'http://gitlab.example.com'Remember to run: gitlab-ctl reconfigure after every change.
Firewall
It is time to let your firewall accept incoming traffic on your gitlab site. You can do this with a lot of ways:
-
Stop your firewall
# systemctl stop firewalld -
Accept everything on your http service
# firewall-cmd --permanent --add-service=http -
Accept your lan:
# firewall-cmd --permanent --add-source=192.168.122.0/24 - Accept only tcp IPv4 traffic from a specific lan
# firewall-cmd --permanent --direct --add-rule ipv4 filter INPUT 0 -p tcp -s 192.168.0.0/16 -j ACCEPT
okay, I think you’ve got the idea.
Dont forget to reload your firewall:
# firewall-cmd --reload
success
Browser
It is time to open your browser and point it to your gitlab installation:
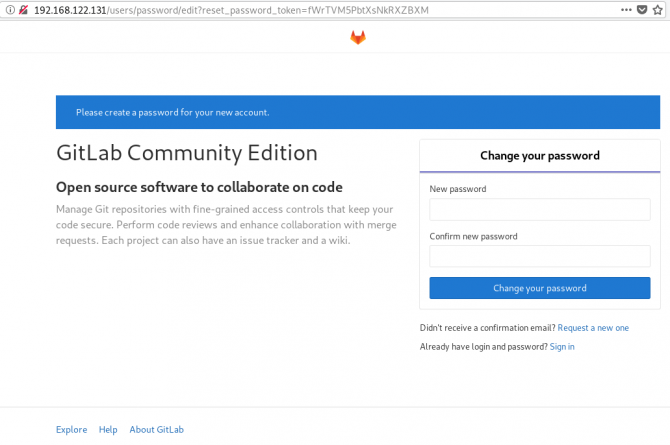
http://192.168.122.131/this is how it looks:
and your first action is to Create a new password by typing a password and hitting the Change your password button.
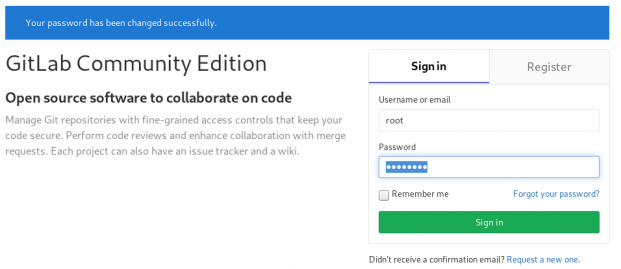
Login
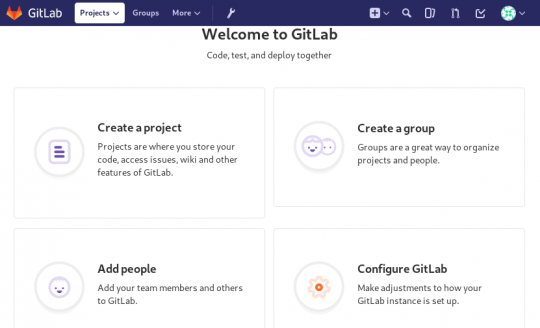
First Page
New Project
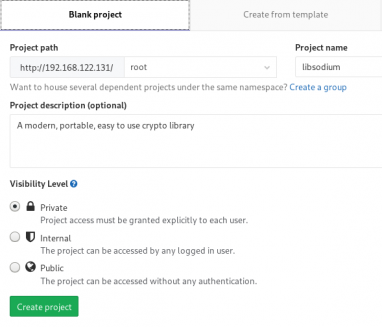
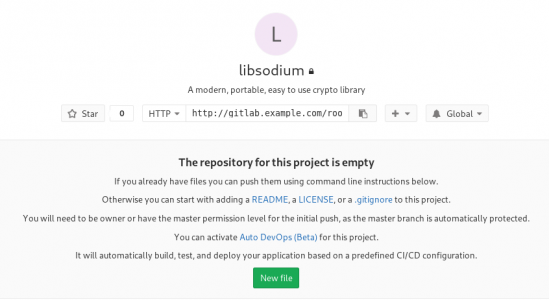
I want to start this journey with a simple-to-build project, so I will try to build libsodium,
a modern, portable, easy to use crypto library.
New project --> Blank projectI will use this libsodium.spec file as the example for the CI/CD.
Docker
The idea is to build the rpm package of libsodium for CentOS 6, so we want to use docker containers through the gitlab CI/CD. The installation of docker is really simple as it is the download of a centos 6 image:
Installation
# yum -y install docker Run Docker
# systemctl restart docker
# systemctl enable  docker
Download image
# docker pull centos:6 Trying to pull repository docker.io/library/centos ...
6: Pulling from docker.io/library/centos
ca9499a209fd: Pull complete
Digest: sha256:551de58ca434f5da1c7fc770c32c6a2897de33eb7fde7508e9149758e07d3fe3View Docker Images
# docker imagesREPOSITORY TAG IMAGE ID CREATED SIZE
docker.io/centos 6 609c1f9b5406 7 weeks ago 194.5 MBGitlab Runner
Now, it is time to install and setup GitLab Runner.
In a nutshell this program that is written in golang with listen to every change on our repository and run every job that it can find on our yml file. But lets start with the installation:
# curl -s 'https://packages.gitlab.com/install/repositories/runner/gitlab-runner/config_file.repo?os=centos&dist=7&source=script' \
  -o /etc/yum.repos.d/gitlab-runner.repo

# yum -y install gitlab-runner
GitLab Runner Settings
We need to connect our project with the gitlab-runner.
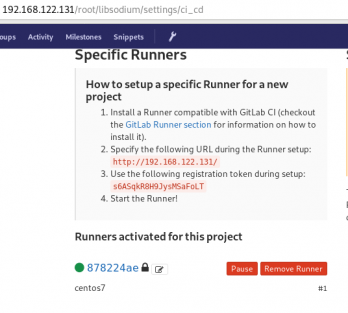
Project --> Settings --> CI/CDor in our example:
http://192.168.122.131/root/libsodium/settings/ci_cd
click on the expand button on Runners settings and you should see something like this:

Register GitLab Runner
In your console type:
# gitlab-runner registerfollowing the instructions
[root@centos7 ~]# gitlab-runner register
Running in system-mode.

Please enter the gitlab-ci coordinator URL (e.g. https://gitlab.com/):
http://192.168.122.131/

Please enter the gitlab-ci token for this runner:
s6ASqkR8H9JysMSaFoLT

Please enter the gitlab-ci description for this runner:
[centos7]:

Please enter the gitlab-ci tags for this runner (comma separated):

Whether to lock the Runner to current project [true/false]:
[true]:

Registering runner... succeeded                     runner=s6ASqkR8

Please enter the executor: docker, ssh, virtualbox, docker-ssh+machine, kubernetes, docker-ssh, parallels, shell, docker+machine:
docker

Please enter the default Docker image (e.g. ruby:2.1):
centos:6

Runner registered successfully. Feel free to start it, but if it's running already the config should be automatically reloaded!
[root@centos7 ~]#
refreshing the previous page we will see a new active runner on our project.
The Docker executor
We are ready to setup our first executor to our project. That means we are ready to run our first CI/CD example!
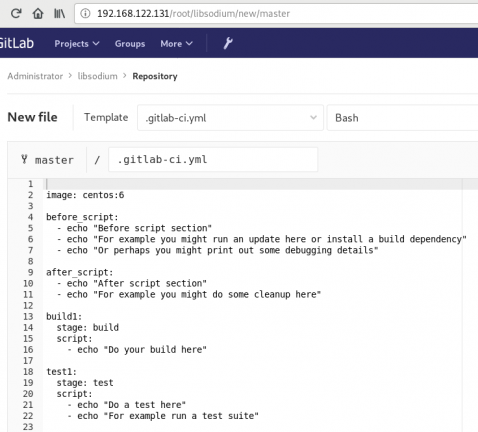
In gitlab this is super easy, just add a
New file --> Template --> gitlab-ci.yml --> based on bashDont forget to change the image from busybox:latest to centos:6
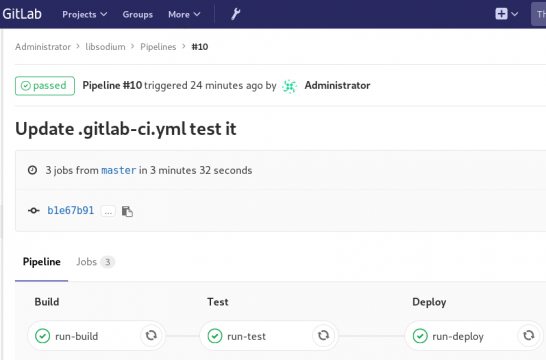
that will start a pipeline
GitLab Continuous Integration
Below is a gitlab ci test file that builds the rpm libsodium :
.gitlab-ci.yml
image: centos:6

before_script:
  - echo "Get the libsodium version and name from the rpm spec file"
  - export LIBSODIUM_VERS=$(egrep '^Version:' libsodium.spec | awk '{print $NF}')
  - export LIBSODIUM_NAME=$(egrep '^Name:'    libsodium.spec | awk '{print $NF}')

run-build:
  stage: build
  artifacts:
    untracked: true
  script:
    - echo "Install rpm-build package"
    - yum -y install rpm-build
    - echo "Install BuildRequires"
    - yum -y install gcc
    - echo "Create rpmbuild directories"
    - mkdir -p rpmbuild/{BUILD,RPMS,SOURCES,SPECS,SRPMS}
    - echo "Download source file from github"
    - curl -s -L https://github.com/jedisct1/$LIBSODIUM_NAME/releases/download/$LIBSODIUM_VERS/$LIBSODIUM_NAME-$LIBSODIUM_VERS.tar.gz -o rpmbuild/SOURCES/$LIBSODIUM_NAME-$LIBSODIUM_VERS.tar.gz
    - rpmbuild -D "_topdir `pwd`/rpmbuild" --clean -ba `pwd`/libsodium.spec

run-test:
  stage: test
  script:
    - echo "Test it, Just test it !"
    - yum -y install rpmbuild/RPMS/x86_64/$LIBSODIUM_NAME-$LIBSODIUM_VERS-*.rpm

run-deploy:
  stage: deploy
  script:
    - echo "Do your deploy here"
GitLab Artifacts
Before continue I need to talk about artifacts
Artifacts is a list of files and directories that we produce at stage jobs and are not part of the git repository. We can pass those artifacts between stages, but you have to remember that gitlab can track files that only exists under the git-clone repository and not on the root fs of the docker image.
GitLab Continuous Delivery
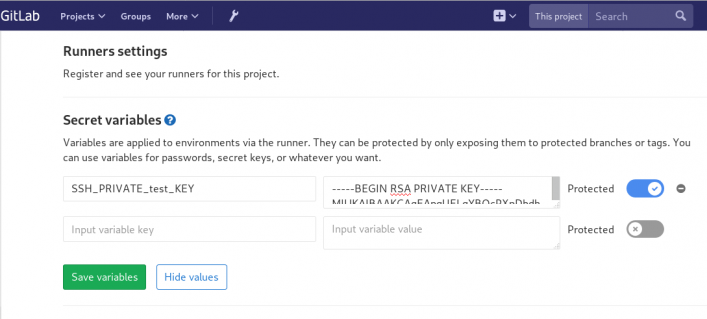
We have successfully build a rpm file! Time to deploy it to another machine. To do that, we need to add the secure shell private key to gitlab secret variables.
Project --> Settings --> CI/CDstage: deploy
Lets re-write gitlab deployment state:
variables:
  DESTINATION_SERVER: '192.168.122.132'

run-deploy:
  stage: deploy
  script:
    - echo "Create ssh root directory"
    - mkdir -p ~/.ssh/ && chmod 700 ~/.ssh/

    - echo "Append secret variable to the ssh private key file"
    - echo -e "$SSH_PRIVATE_test_KEY" > ~/.ssh/id_rsa
    - chmod 0600 ~/.ssh/id_rsa

    - echo "Install SSH client"
    - yum -y install openssh-clients

    - echo "Secure Copy the libsodium rpm file to the destination server"
    - scp -o StrictHostKeyChecking=no rpmbuild/RPMS/x86_64/$LIBSODIUM_NAME-$LIBSODIUM_VERS-*.rpm  $DESTINATION_SERVER:/tmp/

    - echo "Install libsodium rpm file to the destination server"
    - ssh -o StrictHostKeyChecking=no $DESTINATION_SERVER yum -y install /tmp/$LIBSODIUM_NAME-$LIBSODIUM_VERS-*.rpm
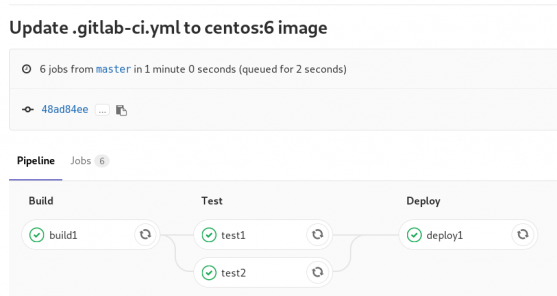
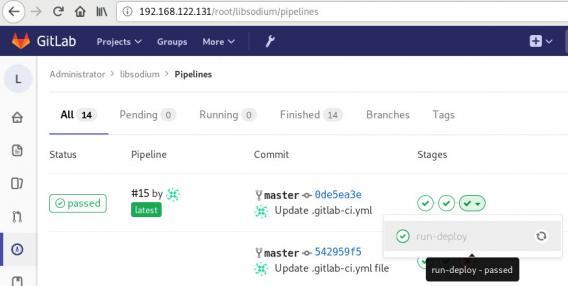
and we can see that our pipeline is passed!
Possible Problems:
that probable will fail!
cause our docker images dont recognize gitlab.example.com.
Disclaimer: If you are using real fqdn - ip then you will probably not occur this problem. I am referring to this issue, only for people who will follow to the letter this article.
Easy fix:
# export -p EXTERNAL_URL="http://192.168.122.131" && yum -y reinstall gitlab-ce